Molded Plastic Parts Surface Textures
- Dominykas Turčinskas

- Sep 22, 2022
- 5 min read
Updated: Jan 19
Texturing (also referred to as engraving or graining) is the procedure through which you add a pattern to the mold’s surface. Doing so will replicate the desired pattern on the plastic part you’re molding.

A product’s texture drastically impacts its functional and esthetic characteristics. That’s why it’s crucial to plan it before the molding process. You need a deep understanding of the texturing process and how different patterns are added to parts.
In this article, you’ll learn about the texturing process and how to select the right texture for your mold. Let’s start with the basics.
What Is Surface Texture and Why Is It Important?
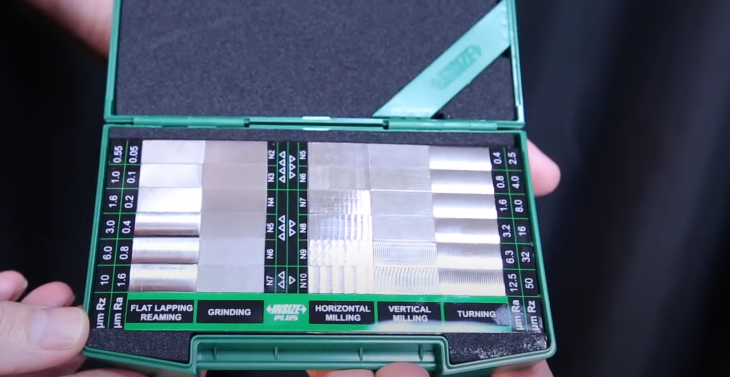
Surface texture can be described using three different parameters:
Waviness – imperfections on the surface caused by repeated cyclical vibrations of the texturing machine.
Lay – describes the general direction of a surface’s pattern.
Roughness – average vertical deviations due to the surface and cutting or sanding tool’s interactions.
There are many reasons to texture a product, and they’re categorized into esthetic and functional purposes.
You can greatly improve a product’s visual appeal with the right texture. Deeper matte textures can add depth to the product or create contrast on a glossy finish. Depending on the target design, a texture can serve various esthetic purposes.
As for functionality, the texture improves a product’s grip, which is crucial for ease of use and safety. In addition, texture supports later design changes like adding paint or labels since it helps with adhesion.
Types of Plastic Surface Textures

SPI (Society of the Plastics Industry – rebranded to PLASTICS)
There are many different surface texture types you can get through several processes, which you’ll learn about later in this article. The first categorization you should know about is the SPI (Society of the Plastics Industry – rebranded to PLASTICS) standard. It separates surface finishes and textures into four categories:
Grade A (High Gloss) – Finished with 1,200-6,000 grit diamond buff
Grade B (Semi-Gloss) – Polished with 320-600 grit sandpaper
Grade C (Matte) – Polished with 320-600 grit stone powder
Grade D (Textured) – Sandblasted with aluminum oxide or glass beads
Each grade encompasses three levels that describe allowable deviation from the perfect texture within the category. That gives 12 distinct types to choose from:
A1-A3 – Glossy and smooth, often used on products like mirrors and visors.
B1-B3 – Good for removing mold tool marks, mostly used for less visually-important parts.
C1-C3 – The most popular types due to their cost effectiveness, used in a variety of parts and products.
D1-D3 – Coarse matte textures, often used in products that require a firmer grip or for similar functional reasons.
The grade you’ll go with significantly impacts the end product’s cost due to the time and materials necessary to create the texture. For instance, Grade A textures are made through diamond buffing, which is far more expensive than sandpaper polishing used for Grade B textures.
VDI (Verein Deutscher Ingenieure)

Another important categorization is VDI (Verein Deutscher Ingenieure). It’s a mold texture standard used by many tool producers. Other than the above texturing methods, VDI textures rely on EDM (Electrical Discharge Machining).
These textures have VDI values starting at 12 and increasing in 3-point increments up to VDI 45. They can vary greatly in surface roughness. VDI 12 has a roughness of 0.4µm, while VDI 45 is 18µm. Due to this range, VDI textures can be used in a variety of parts and products with different esthetic and functional requirements.
Mold-Tech
Finally, we have the Mold-Tech texturing specifications. Mold-Tech also classifies textures into four categories – A, B, C, and D. These textures are created either through laser alteration or chemical etching of the cavity.
Within each grade, there are lots of different textures, denoted by five-digit codes reflecting the texture’s serial numbers and roughness. Grade A finishes are the most common because they offer a wide spectrum of textures. MT-11010, for instance, has a sand-like texture found in many plastic products. On the other hand, MT-11555 offers a wood panel design often used for cosmetic purposes.
Whether you need diamonds, checkerboards, concrete, or any other pattern, Mold-Tech options will give you the exact texture you need. There are hundreds of them, so finding the right one shouldn’t be an issue.
As you can see, many processes can yield all kinds of surfaces. Let’s explain them in more detail.
How the Texturing Process Works
SPI textures rely on traditional engraving methods. For instance, you’ll go through two steps to get Grade D textures.
First, stone powder is used to smoothen the surface. Then, the machine uses glass beads or aluminum oxide to blast it. Dry blasting doesn’t involve linear or circular motions like those involved in Grades A-C, so you’ll get a chaotic non-directional texture.
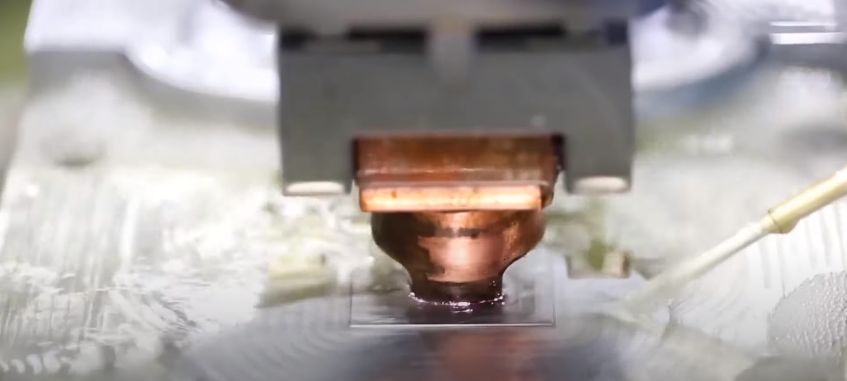
As mentioned, EDM is a process used for VDI textures. An electrical discharge is created between the part and the machine’s electrode or wire. It causes a spark that removes material from the part, creating the desired texture.
Lastly, chemical etching or milling is a subtractive texturing process. It’s a more complex method that involves several steps:
Photoresist film is applied to the material.
Glass or mylar masks are applied, containing the negative image of the desired texture
High-intensity UV light shines through the masks and crosslinks the film wherever the light isn’t blocked.
The non-crosslinked film is chemically removed, revealing bare metal.
An etchant is sprayed, dissolving the bare metal and leaving the desired texture.
Because of all the steps involved, texturing can sometimes be quite expensive. Let’s see how to choose the right texture to save money.
How to Choose the Right Texture?

It’s crucial to decide on the texture during the embodiment design stage. This is because the product’s texture will determine the material selection, as well as the draft angle. If you’re unsure which texture to go with, here are some factors to consider.
Molding Material
Different plastic types can give vastly different textures, even if other parameters stay the same. The same goes for additives and fillers. They can change the material’s properties, significantly influencing the finish.
You can use the specifications mentioned here as guidelines for the type of material you should go with. It’s possible to use tables outlining what textures are the most suitable for each material. There are strict rules to follow here, which eliminates most guesswork and testing.
Mold Tool Material
The most common mold tool materials are steel and aluminum, although other metals can also be used. You need to know what material you’ll use, as it will impact the product’s texture.
For instance, aluminum produces rougher textures than steel. So, if you need deeper textures, it might be a more suitable option.
Tooling Cost
There aren’t many shapes that you can texture or polish automatically. This only goes for the simplest ones, while more complex parts or products often get quite labor-intensive.
Costs of this labor can add up over time, causing you to overspend. That’s why you should be mindful of tooling costs when deciding on the product’s texture. Think about its target functionality and look to determine the most cost-effective solution.
Injection Velocity and Temperature
The speed at which you inject the material can significantly impact its texture, as can the temperature. Generally speaking, to get a more textured surface, you should inject the material more slowly. In addition, higher temperatures usually lead to smoother textures, so this is another parameter you should keep in mind.
Choose the Right Texture

As you can see, a lot of thought goes into selecting the best texture for your product. Now that you know the details of the texturing process and different types, think about the best option for your needs.
Remember to design the product with its texture in mind from the get-go. Doing so can avoid the need for costly modifications later in the manufacturing process.


Comments